Sport, Off-Road, Touring
Santa Fe Edition of SORT
As of Monday, June 5, 2023 at 6:00 PM mountain time:
Sport | Off-Road | Touring |
---|---|---|
2010 Mini Cooper S Laurel Sport |
1995 Mitsubishi Delica Space Gear L400 | 1951 Ford Country Squire Woody Wagon |
This is called the Santa Fe Edition, not as any Hyundai promo, but because this is where I am located right now visiting a friend. |
Here is what last week’s ago cars sold for, or bid to (if the reserve was not met):
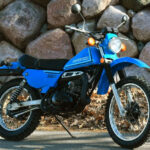
Sports: 2006 Porsche Cayman Sold for $35,000 on 6/1/23
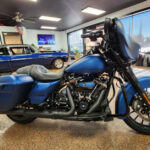
Off-Road: 2002 Jeep Wrangler Sold for $20,000 on 6/2/23
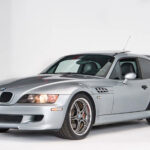
Touring: 2013 BMW 135is Sold for $27,000 on 6/4/23
Good Thing You Make K-Cups Dunkin
Back in Aiken I got addicted to Dunkin Donuts coffee. There were actually two in town and we would alternate going to one or the other for breakfasts a couple times a week. We invested in a Keurig and I bought K-cups and the Dunkin creamer/sweetener so I could enjoy a Dunkin coffee every dang day. So when we moved to Oregon, where there isn’t even one store, it really wasn’t a hardship because of the K-cup creamer combo. But every time we travel I always keep my eye open for a store to get a coffee made by someone else.
For this trip to Mississippi and back I checked for stores in every overnight town with plans to get a good ol’ medium hot Dunkin decaf with regular cream and sugar (regular in Dunkin speak means 3 sugars and 3 creamers.) My first chance came in Hobbs, NM and I can’t for the life of me remember why I didn’t go to it. Hey, I’m old and it was 2 weeks ago so if I didn’t write about it here it didn’t happen.
My first real Dunkin experience was 3 days ago in Killeen, TX. There was one just 4 miles from the hotel so Donna sent me on a trip to go get my coffee while she finished packing up all our crap. I rolled thru the drive in and got my usual order. Stopped and filled up the car with gas and when I got back to the hotel I took my first sip. They obviously didn’t understand the Dunkin phrase “regular” because it tasted like just 1 cream and 1 sugar. At the breakfast area in the hotel I added a couple of sugar packets, but couldn’t totally fix it because all they had was hazelnut cream.
Our next stop with a Dunkin was Odessa, Texas. We tried the same trick as last time in Killeen, I went off on my own with the Google Maps lady directing me. This one was a lot further than Killeen, but the route looked pretty simple, go 3 miles on the I-20 service road, turn right onto TX388 Loop, go three miles turn right off the loop, a quick left and then another quick left. When I took that second left I knew something was wrong because I was in an industrial area. When little Miss Google said you have reached your destination I was in a gravel lot of a small gray warehouse with absolutely no signage.
So I gave up and started back to the hotel. I couldn’t make a left to get back on the Loop, so I turned right and merged back on heading a 1/2 mile up to the next exit. The one really nice thing Texas has in these situations is a dedicated U-turn lane that doesn’t make you sit through several traffic lights to go right back in the opposite direction. I zipped around the U-turn lane and as I got pointed back towards the hotel on the entrance ramp what did I see in my rearview mirror but a big Pilot Truck Stop sign and a Dunkin sign right below it! At this point I was so frustrated that I watched those signs shrink in the distance as I kept going back to the hotel.
Leaving Odessa we were heading due north along US385 and as it turned out there was another Dunkin in the next town, Andrews just 30 miles away. It too was in a Pilot Truck Stop so as got to where it was located I pulled in and went inside and there wasn’t anything Dunkin related at all. When I walked outside all sad like, I notice that I had just gone into a Love’s Truck Stop. Doh! The Pilot was across the street. Donna suggested we walk, but I poo-poo’d it because of the 18-wheeled truck traffic we’d need to dodge. When I went inside Pilot the Dunkin was just a self-serve area with a couple large urns, a small cabinet with a few doughnuts and an extremely messy condiment area. I made a medium (not decaf) with what might have been creamer and some liquid sugar. It was OK, but barely worth the effort.
The next Dunkin was in Clovis, New Mexico and instead of waiting until morning Donna, suggested I get one when we arrived in town. Turns out it too was in a Pilot Truck Stop and because of that, I didn’t even think of trying it because our next stop was Santa Fe and I know they have a real store that I have been to on previous visits.
Santa Fe Fuego
We arrived at Casa de Sally in Santa Fe around lunch time after a shortish drive from Clovis, NM near the Texas border. We then spent the afternoon chatting until it came time to take ourselves out to the ballgame. We were off to Fort Marcy Park to see the Santa Fe Fuego play the Trinidad (CO) Triggers.
Because Sally has extra bedrooms (even with Donna and I there) she is hosting a couple ball players for the local independent minor league baseball team of the Pecos League. For housing these two players, she is compensated with 4 sets of season tickets for all 30 of their home games. The season just started and tonight was just the second home game and Sally has seen both of them. It is a fun night out, but I don’t think Sally will be there for all the other 28.
Four More Arrows In Our Quiver
Back ten days ago we passed up on looking for the Quanah Parker Arrow in Seminole, TX on our way east because of traffic. Well, today on our way west, we sought it out. The photos below came from there; the arrow, the plaque at the base (some have this, some don’t) and a shot of the arrow’s fletching through the sunroof.
The very next town 17 miles along the route, Seagraves, TX, also had an arrow located right outside the town’s museum. These next photos are from there; the arrow, a smaller replica inside and a portrait of Chief Quanah Parker himself on a wall inside by a local artist. We must have spent an hour inside the museum. It was a treasure trove of cool bits, it was almost being inside the dusty attics of the town and surrounding county folk’s homes. Military memorabilia from several past wars, high school band and dance team uniforms, school yearbooks, football team photos, random family photos (some marked, other not so much), school art projects and some really nice art from local artists.
Twenty miles further up the road was the town of Brownfield and Donna located an arrow outside the the county museum. We didn’t go inside here like we did in Seagraves. It was about lunch time so we found a local restaurant that served Cajun food and on the way there we spotted a second arrow in town. So after eating we doubled back to take a picture of it too.
Donna found another arrow in the town of Littlefield about 50 miles further north, but we never made it. About halfway up in the town of Levelland we could see the dark gray skies of a thunderstorm up ahead. After looking at the radar we opted to head west and kind of run through the storm width instead driving straight through the length of it. Maybe next time we should just wait that kind of storm out. The distance between Levelland and Morton is about 25 miles and it poured almost the entire way, sometimes the rain drops were hitting the car sounded like hail. Fortunately it wasn’t hail because if it was our crack in the windshield might have gotten a lot bigger. In Morton the rain slowed way down and we stopped a quick stop to get couple sodas and a snack before heading back out on the road.
This is where it got interesting. We were going to head straight north on TX214 towards Muleshoe, but at the north end of town there was a raging river across the highway. We stopped and watched several large vehicles crash through the running water and decided the Mini would never make it. Our next option was to go due west on TX114 and turn north on TX596. We got a mile down 596 before having to turn around because of high water on the road. U-turn back to TX 144 and continue west towards New Mexico. Three miles or so down that road and this time there was a small lake over the road, so we back tracked to Morton. The river across the road north was still raging. We couldn’t go back east because that meant driving back through the storm so our only option was to try going south. This time we got lucky.
Seven miles south of Morton on TX214 we came to TX125 heading west and pulled over for a second to formulate a plan. About that time an 18-wheel tanker truck passed by going west, I pulled out and followed. By this time it was just sprinkling, so I stayed back a hundred yards or so and watched for him to hit the water first. And as it turned out there were only a few places that had enough water on the side of the road to make us move over to get by. About halfway to the New Mexico border the truck pulled into an oil field so we were on our own, that was fine because by that time and place, the road the rest of the way to Clovis was mostly dry.
35,000 Oil Wells
There is a reason we picked this particular spot to stop along the way west, it is home to Donna’s older brother Steve. We had dinner with him at the local Cracker Barrel. The last time we saw him was when we were headed to Lake Tahoe for a niece’s wedding back in 2018.
We started the day in Killeen and ended in Odessa. The title of todays posts went from 35,000 Black-eyed Susans along the roadsides of the hill country to 35,000 wind turbines the further west we went and ended it up what you see above when we entered the Permian Basin. There were no real Roadside America goals today, but we did stumble on a couple of things right here in Odessa. An even bigger long horn skull than we found in Albany, TX a week ago on our way east and a Stonehenge replica on the campus of the University of Texas Permian Basin.
About 100 miles west of Killeen the Mini eased past the 35,000 mile mark.
25 Years Ago – Issue III 1998
Back in 2015 I did this the easy way on our previous Miata. I bought a $20 stripe kit from Advance Auto and spent a couple hours carefully trimming and squeegeeing tiny air bubbles out of the vinyl…
Blackout
Paint and body wizard Andrew P. Schank covers a fast but
major tweak you can make to your MX-5’s visual character.
As a paint-and-body guy, the first thing I notice when I see a Miata is the windshield pillar. Mazda had to make it strong, and that meant they also made it big. So in bright colors especially, I think that wide, bodycolor header rail makes the car look like a 1/43rd-scale model—it just seems out of place. The solution is surprisingly simple: Paint the A-pillars and header rail satin black. This dark, nonreflective color visually shrinks whatever it touches, leaving the whole Miata looking lower, sleeker, and more exotic. It’s a minor cosmetic operation that makes a major difference in the customized look of the car. Here’s all there is to it:
1. The header rubber and A-pillar seals are all one piece. To remove it, unscrew the top latches, take off the rearview mirror, and loosen the black-plastic trim on the inside of the header rail. Also loosen the sill plates. Now pry out the two plastic plugs holding the seals to the header at the top corners of the windshield—there’s actually a special tool for this, but you can also get them out with gentle coaxing from a large flat-bladed screwdriver.
2. Now degrease the A-pillar and windshield header inside and out using a commercial degreasing solvent and lint-free paper shop towels (both are available at your local auto paint supply store). Repeat this process two or three times before proceeding—this is a greasy, silicone-laden area, and it won’t take paint until all the goop has been removed.
3. After degreasing, mask off the exterior windshield beading with a very tight strip of 1/4-inch tape (also found at your paint store). Err on the beading side if you have to; the last. thing you want is a sliver of red or white paint showing after you’re done. Now move on to the bottoms of the A-pillars, where you’ll run a straight, horizontal masking strip about an inch below the dashboard line. For a clean, factory look, close the doors and peer into the crack: If you can’t see the tape, your cutoff line is far enough down the pillar. Finally, mask off the inside of the header rail well below the level that will be covered by the interior trim.
4. After taping off the beading, header rail, and pillars, use 320 to 360 grit sandpaper to rough up the surfaces you’ll be painting. This will give the new color something to grab onto. When you’re done with the sanding, degrease and clean the entire area one more time.
5. Here’s the critical part: Mask off just about the rest of the car. Overspray is insidious stuff, and it gets almost everywhere. I like to throw an old car cover over the body from the seats to the back, then protect everything else with broad, top-quality masking tape and professional-grade masking paper (again from your paint store). One short roll of 18 inch paper will be plenty. Oh, and never use newspapers for masking—modern solvents go right through them, and the newsprint creates a lot of lint.
6. Now you’re ready to start shooting paint. If you’re lucky enough to have your own spray rig, I recommend a professional two-part primer like PPG DP90 with DP402 hardener. That means wearing a mask and cleaning a lot of equipment, though, so second best is a rattle-can of top-quality, extra-durable flat-black primer from your auto-paint supplier. (In truth, you can skip the primer step altogether and go straight to the color coat if you have to. Primer greatly increases the final coats’ durability, and this area does get a lot of chips and dings—on the other hand, satin black is a snap to repair, so longevity may not matter to you. Just fogging in a few light coats will re-cover any blemishes without seriously altering the finish.)
7. After you’ve shot two medium-thin coats of primer and allowed them to dry, you’re ready for the color coats. I like to use Mar-Hyde Satin Black trim paint for this job, though SEM makes a similar rattle-can product that seems just as tough—what you’re after here is any extremely durable, professional-grade paint. In any case, all satin-finish spray cans require a whole lot of shaking. Because of the heavy flatteners inside, when the directions say “shake for two minutes after the ball starts to rattle,” they’re not kidding around. An incompletely shaken can will only give you the light, thin solvents at the top, and waves and fish-eyes will result.
8. Satin finishes are also very sensitive to spray density. It’s definitely better to shoot three or four light, fogged-on coats than trying to hose on a single heavy layer. If you build up too much paint too fast, the finish will be shinier than you want and not very durable. It’ll also be glossy where you really puddled it up and flat where it’s thinner—that’s why multiple light coats give a nice, even finish.
9. After your final color coat has dried about ten or 15 minutes, take off all the masking tape. Don’t let it go too long or you might lift off a chip of paint while removing the tape. The painted surface should be left indoors to cure and harden overnight before reinstalling all the trim and weatherstripping.
10. Once all the masking tape and papers are removed, check all around the car for overspray—it may appear as nothing more than a slightly rough finish to some previously smooth panels. To remove any overspray, try wiping the area down with bug-and-tar cleaner first. This may dull the shine, but it won’t hurt the existing paint—you can just re-polish the area later if you need to. Tougher over-spray can be removed by rubbing out the affected area with a medium-grit cleaning or polishing compound.
11. After the header and pillars are totally dry, re-install the trim parts and you’re ready for the road. As with most painting tasks, there’s nothing terribly difficult here; all it takes is careful preparation and scrupulous attention to keeping everything clean. Best of all, your Miata will suddenly stand out from the crowd—not a bad afternoon’s work!